Sunday, June 28, 2015

Augmented Reality


Augmented reality is a new term for me.  Once I looked up its meaning, I realized that it was one of those concepts that I was already familiar with, I just didn't know that it actually had a name!  One of those times when you think to yourself, "I can't explain it, but when I see, I know it!"  I just finished up a week as the assistant administrator of a STEM Academy that we run with the help of the College of William & Mary each year, and one of the other administrators brought his Google glasses.  He let the kids try them out, and the adults were probably even more excited than the kids!  Google glasses are a great example of augmented reality as they flash information in front of your eyes.  Unlike virtual reality, which completely immerses you in a created world, augmented reality merely enhances your reality with additional graphics, sounds, smells, and sensory feedback.  

In the National Geographic article on augmented reality, it was neat to see that smartphones could be used to find much more than directions.  If a student was on a field trip, a smartphone could be used to find points of interest and additional information about monuments, constellations, landmarks, museums, etc.  For example, while visiting nearby Fredericksburg, VA, students could use their phones to not only see a map of the soldier's cemetery, but could also see pop-ups with biographies of famous soldiers buried there and historical facts about the battles fought in the area.

Photo credit: Keoni Cabral / Foter / CC BY
I found some great ideas of incorporating the use of QR codes into the library by researching on the internet.  One of the first sites I opened included "40 Interesting Ways to Use QR Codes in the Classroom" (click here to check it out!)  To expand on their ideas, here are some that I thought could be adapted to use in the library:

  • Add QR codes to students' worksheets so that they can check their answers when they have completed questions.  For example, if a worksheet about the Dewey Decimal System had 10 questions, it could be made into a table with the question in one box, an empty box for the students' answers in the second box, and a QR code in the third box that could be scanned to "self check" once the answer was complete.  
  • Use QR codes to advertise library events, such as book club meetings, book fair dates, etc.  They could be printed in bright colors on qrstuff.com  and displayed in the hallway outside the library for students to access easily.
  • Add QR codes to the back of library books to enhance and extend the information from the material.  For example, if a student had just finished "Divergent", the QR code might link to the book trailers for "Allegiant" and "Insurgent" to entice the student to keep reading the series.  QR codes might also be linked to videos, such as interviews with the author, student-made book trailers, or a close up of locations that are described in the book.
  • Display a QR code in a prominent place (such as the circulation desk) that links to the "video of the day" and change it daily/weekly/etc.  It might relate to a recent book talk, a best seller at the book fair, or a special library focus such as "banned book week" or "poetry month".
  • Create a virtual tour of the library and link it on a QR code.  New students could access the QR code and "tour" the library before visiting it.  The QR code could also be used during library orientation.
Photo credit: bmann / Foter / CC BY-NC
References:

http://aftech.pbworks.com/f/40_Interesting_Ways_to_Use_QR_Codes_in_the_Cla(1).pdf.  Retrieved on June 28, 2015.


 Roth, V. (2013). Divergent. New York: Katherine Tegen Books. 

http://www.qrstuff.com.  Retrieved on June 28, 2015.

http://ngm.nationalgeographic.com/big-idea/14/augmented-reality.  Retrieved on June 28, 2015.

Wednesday, June 24, 2015

My QR Code

I feel like this post should start with a disclaimer:  My name is Jessica and I have almost no experience with QR codes at all.  Whew, nice to have that out of the way!  Like most people, I see QR codes everywhere--the grocery store, classrooms, my kids' homework assignments, etc.  My son had a very technology-savvy math teacher who used them in her Algebra lessons two years ago.  And while I knew what a QR code looked like, I didn't know the wide selection of resources that you could link to them.  During a quick internet search for more information about how QR codes could be used in the classroom, I found out that there are full websites devoted just to QR code activities in school.  
I created a QR code using a QR Code Generator at www.qrstuff.com.  It allows you to make QR codes in different colors,which would be great if you did an activity that divided the kids into different groups.  My QR code links directly to Mr. Parr's YouTube channel.  I play a lot of his songs in my science class and the kids really like them.  Mr. Parr uses current songs and just changes the words to reflect science content, such as "The Water Cycle song" or "Biomes".  They are a great introduction, review, or reward.  With a QR code, students can access his songs with a click of their phones.

References

http://www.schrockguide.net/qr-codes-in-the-classroom.html

http://www.qrstuff.com/

Tuesday, June 23, 2015

Making Videos

For this week's Sandbox activities, I explored some website for creating videos.  I already have some experience with Windows Movie Maker because my students create amphibian metamorphosis movies each year when we cover different phyla of vertebrates.  I provide them with a pile of Play Doh, some digital cameras, and the laptops, and they run with it!  They make Play Doh models of the different stages of egg, tadpole, young adult, and adult frog and take pictures of each stage.  The students then put the photos into a filmstrip and add effects, titles, and credits.  Movie Maker has been my only experience, so it was fun to explore other sites.
I first visited animoto.com.  I didn't want to commit to an account, but I was required to in order to use the program.  I identified myself as a teacher and got extra time for my movies--bonus!  The site was easy to use--just upload your photos and add the pizazz!  My students would probably love this site, and I could see us using it for our amphibian movies instead of Movie Maker.  We could also use the site to make videos of different processes in life science, such as mitosis, DNA replication, or photosynthesis.
 I next visited photopeach.com and found a very user-friendly site.  T doesn't have much in the way of special effects, so after you put in your photos and add some captions, you have pretty much exhausted its capabilities.  My students would probably find this site to be very limiting.
I tried out Pixiclip because it seemed like a fun site for creating drawings/illustrations/pictures instead of video.  I saw from the site that I could add video with a webcam or record my voice.  I chose to just use the drawing tools and create an illustration of the cell cycle.  I found the drawing tools to be somewhat limiting (only two thicknesses of pencil and marker), limited color choices, and no preloaded shapes to drop into the picture.  I felt like a kid using an Etch-A-Sketch to get the drawings to somewhat resemble cells during replication!  Thank goodness for the "text" tool so I could add a label!  
My last visit was to powtoon.com.  I saw this program used in a training but have never used it myself.  I watched the tutorial and found it very easy to use!  I was making a movie within three minutes of opening the site.  My first attempt at a movie came to a halt when I tried to save it and was told I have to upgrade my account because I had used "premium" images.  My bad!  Instead of changing out all of the images, I just started from scratch--lesson learned!  I steered clear of any themes that included the word "premium" and was good to go.  
Check out my movie below:


References

Powtoon (2014).  http://www.powtoon.com

Animoto (2015).  http://www.animoto.com

Photo Peach (2015).  http://www.photopeach.com

Pixiclip (2015).  http://www.pixiclip.com/beta/

Sunday, June 14, 2015

The Good, the Bad, and the Weebly: School Web Site Examples

I read over the sandbox requirements for this week's lessons on school websites, and I enlisted my daughter's help on finding website examples that really caught her eye (disclaimer:  she has just finished 7th grade, so she considers herself to be a good judge of websites for what would appeal to a middle school audience).  We clicked through a few examples until we found some that grabbed our interest.  Before we started looking, I went through the protocol that I read in the blog post "5 Things Every School Website Should Have" on  "The Adventures of Library Girl":  (1) focus on teaching; (2) examples of student work; (3) opportunities for participation; (4) evolving resources; and (5) flavor! (source)

Our top picks:

Wellesley Middle School (click here to visit)

  • Videos:  Embedded videos were immediately seen when I opened the site.  I think that would draw the attention of middle school students.  
  • Color choices:  solid white background is simple and clean.  The bright red text box at the top of the screen immediately identifies the school's name.  The color combination of gray, white, and red is classic and timeless.
  • Toolbar:  Extensive toolbar options across the top of the screen were easy to navigate and gave the user plenty of options for investigating the site.  My daughter especially appreciated the summer reading list.  The "extras" on the website allow students to use it during the summer months as well as during the school year.
  • Images:  Library calendar and hours were identifiable at the bottom of the main page because of their large images.  It was very easy to find important information (hours, times, people, contact info, etc.) on this page.
Bailey Middle School (click here to visit)
  • Design:  Dark background is a modern "wood" design and really lets the information/text/images "pop" off the screen.  Simple color scheme of charcoal gray/white/blue is modern and clean.
  • Tweet feed:  I immediately saw the Tweet feed in the middle of the screen and LOVE that feature!  What a great way to keep up with the activities and messages from the library.  The use of a twitter account also tells me that this is a librarian who keeps up with the technology available to her.
  • Images/graphics:  The "AR" stats on the teal background grabbed my attention as well.  It gives immediate feedback on the Accelerated Reader program and how well it is implemented in that school.
  • Video:  Embedded video about banned books (made by the author of "Captain Underpants" series) would probably be viewed by many visitors to the site because of the content matter and author choice.  I like that the librarian doesn't seem to shy away from controversial topics, such as censorship.
Based on what I saw while doing my search on the internet, I will probably be using Weebly to make my school library website.  It seems very "user friendly" and I like the color schemes and formats that are offered.  I also like that it will be easy to add additional features, such as video clips, pod casts, tool bars, images, graphics, and tweet feeds.

Tuesday, June 9, 2015

Using Podcasts in the Classroom

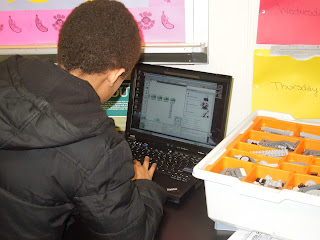
For this assignment, I listened to several different pod casts pertaining to STEM in education.  I have been the robotics coordinator for our county for the past 7 years, and one of the main components of our robotics program is to bring real-world applications to the activities of the students.  In order to accomplish that, we use LEGO Mindstorm robotics kits.   The students work in cooperative learning groups to build robots and successfully complete challenges using the robots.  We have partnered with the local defense base for mentors, so scientists and engineers from Dahlgren Base come to the school and work with the students during robotics activities. 

 See the pictures below, taken by me, during our robotics implementation last year:


Long story short, I found the following podcast--the Engineering Commons--very interesting.  It includes a group of 4 engineers who discuss current issues in engineering and how to solve problems for the good of humanity.  One of the main component of our robotics program is to introduce engineering as a career option to the students.  Most students incorrectly think that an engineer is just the guy who drives the train!  And if a student doesn't know that a career exists, they can't exactly prepare in middle and high school to take the classes that would be beneficial for a specific degree.  

So we talk about engineers and what they do for a career, and the students are fascinated.  They often don't realize that engineers design roller coasters, create new makeups and perfume, build skyscrapers, or design the rail gun (which is what our defense base is famous for).  Listening to the pod cast during our robotics program and throughout the year could give students a first-hand account of what it's like to become an engineer for a career.

Monday, June 8, 2015

Audio Tools for the Classroom

Audio tools seem like a great way to give students a hands on experience when learning the content.  I have taken several professional development classes that are meant to help incorporate more technology into our lessons.  One of our technology instructors really prides herself with keeping up on the latest "technology in the classroom" trends.  She introduced me to Voki, so I had a little experience with that program in the past, but this time I was able to take my time and really explore it.  I visited http://www.voki.com and created an avatar that I had recite information about different classifications of arthropods.  Next, I handed over the microphone to my four year old and she filled several recordings while talking about her upcoming gymnastics recital!  So the program was very easy to use!  I could see using the avatars to explain scientific concepts or giving historical speeches in the classroom.

The next program I explored was https://clyp.it/.  The program seems very basic.  I was able to record my voice and save the file.  This program lacked the flashy additions that I have seen in other programs.  

The next program I tried out was Blabberize.  I had heard about Blabberize from another teacher but never used it myself.  As a test run, I downloaded a picture of a flower and had it "talk" about where pollen is created.  I could see myself using this program for several units of life science, including a cell talking about its organelles and the functions of the organelles (example:  "This part is the nucleus, and it holds the DNA so it's the control center of the cell!").  We could also use it when classifying organisms or describing the characteristics of vertebrates and invertebrates.  Students could also take pictures of our scientific equipment and have the equipment "blab" about what it's used for and how it can be used safely in the science classroom (example:  "I'm a compound light microscope and I have 3 different objective lenses to help you magnify your view.  Carry me on the arm and base for safety!")

I used blabberize.com to create a talking flower that describes which part of the flower produces the pollen.  The image was found at funcrisp.com


Monday, June 1, 2015

My Infographic

For this blog post, I was instructed to create an infographic.  I have seen them several times on the internet on various websites, but I didn't know before now that this particular graphic had a name!  How very cool!  

I started on piktochart.com because I had seen several class mates' reviews that other sites were difficult to use.  Also, since I already have a google account, signing up for piktochart was very simple!  At first, I had some of the same complaints that my class mates did:  the website lagged behind every time I clicked on a box, so the boxes started to move where I didn't want to go!  I also found it difficult to change out the graphics.  The available photos weren't very plentiful, but the clipart icons were great!  I also saw that there is an option to import your own photos, but it's nice to have a program that already comes loaded with lots of graphics.

I did my infographic on DNA (I'm kind of running with a theme here, did you notice?)  because we're in drill-and-kill "review mode" at my school for SOL tests, and I just talked about DNA last week.  So it was still fresh on my mind!  I started with a template and did not make any color changes to the preloaded setup. 
I tried to keep some of G. Reynolds' ideas on color and design in my head as I set up my information.   I liked the light colored background and thought it would not be distracting to someone reading the information.   I also used green, blue and yellow as my main colors because of their close proximity to each other on the color wheel.  I found the colors to be very harmonious together.  My font was simple and easy to read from a distance, and my headings were put into bold to give extra visibility.

As far as application in the classroom, I could see this program's advantage for outlining main ideas in science class.  Some of my less tech-savvy students may find the website frustrating to use, but if I kept the main idea simple and straight forward (such as "7 characteristics of mammals" or "5 groups of vertebrates in the animal kingdom"), they could really show their knowledge on this program.  I see this program's strengths in helping students lay out linear information with graphics to help master the concepts.  
Students would have to do research ahead of time and come to the table with their information "ready to go".  The program offers several blank "cheat sheets" to use when selecting a template, and as a teacher, I would be tempted to make paper copies of those blank templates for students to use before they start on the computer.


Source:  Reynolds, G. (2014).  Presentation Zen Design.  2d ed.  New Riders/Pearson.